This report is on what I found while imaging the M96 Group. I ended up capturing 20 galaxies. The report details issues both in image processing and image and is a fairly typical representation of the experimentation in astrophotography. I’m going to share the final product with labels now, then show how the picture evolved.
Background
I’ve been working my way through the Messier objects, which are a list of 110 “comet-like” entities that were cataloged by the French astronomer Charles Messier in the 1700s. They’re a great list for an amateur astronomer to knock out, as they were visible using the optics of the 1700s, many are visible with modern binoculars. They are “comet-like” objects because the notion of a galaxy was not formalized until 1926 by Edwin Hubble.

On February 8, I set out to image M95, M96, and M105, collectively known as the “M96 Group”. These three galaxies are really close together and of a decent size, making them easy to image at once. They are all about 37 Million light-years away, which makes the use of long-exposures a necessity.
Imaging
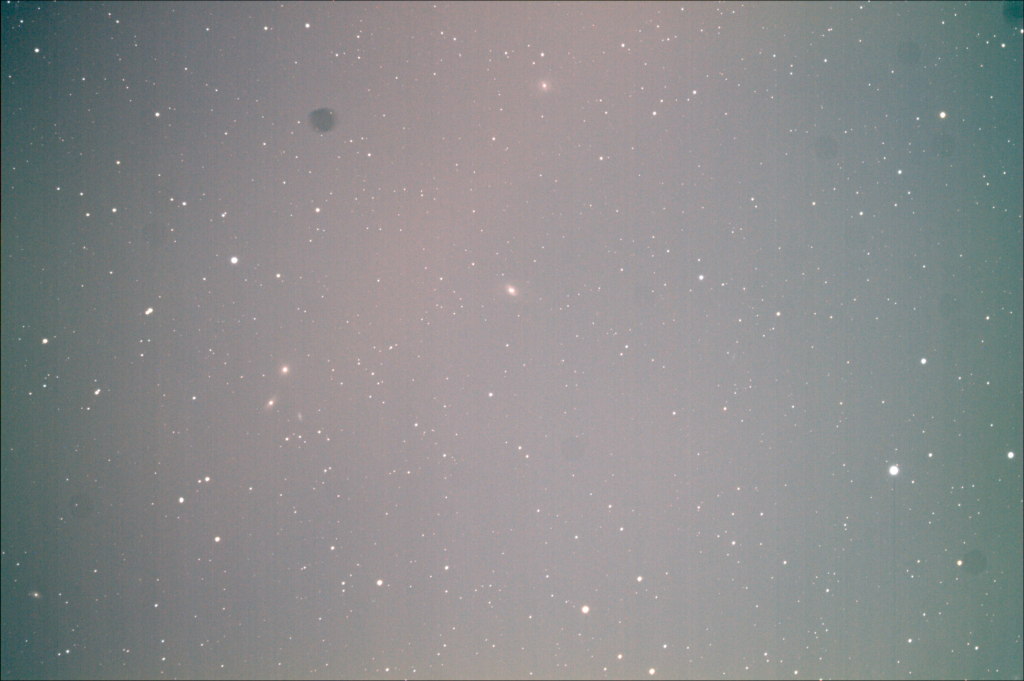
As the first 5-minute exposures came back, I ran into some issues right away: the dust on my camera sensor, which I had been delaying cleaning, was creating little distortions all across the deep field of stars. For most of the objects I had targeted so far, I was able to crop around the dirt. However, these objects were perfectly positioned to make that impossible.
Another issue was guiding. In order to get clear, pinpoint stars in a long-exposure image, the movement of the stars must be counteracted. There are two mechanisms at work: an electronic “tracking” mount moves in lock step with the stars. However, precise polar alignment is required to set the reference point to have accurate tracking. This is often difficult. In order to correct for poor polar alignment, “guiding” is often used. A secondary imaging system is mounted to the primary telescope. It is attached to a computer, which calculates the drift of the star field using a guide star and sends small “pulse” signals to the tracking mount.

The first time I used guiding, everything “just worked”, I stayed within the error tolerance with no effort. The second time, it was failing quite regularly with more than 8 arc-seconds of drift and constantly trying to find new guide stars. What happened? Did I forget to balance the scope? Was the guide scope going out of focus? No. It was just clouds!
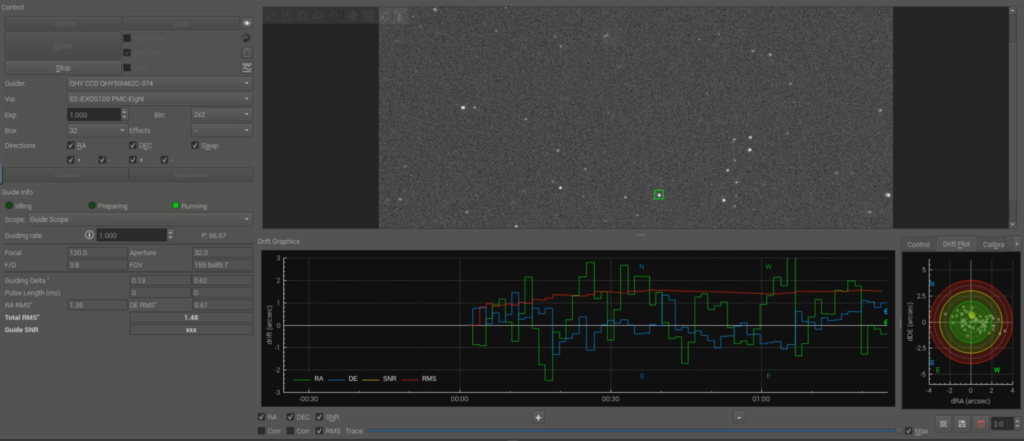
That’s when I discovered a really cool feature of my imaging software, KStars: it can abort an exposure if guiding error goes above a threshold and retry once the guiding settles down. An interesting consequence is that if a cloud appears, the star will disappear, and errors will rapidly go up, aborting the exposure. Essentially, I can use this to automatically image even if there are sporadic clouds.

Finally, all these errors gave me a chance to look at the framing of my shot. When I took my first shots and started processing, I noticed two more galaxies near M105: NGC3384 and NGC3389. As I looked at the shot alignment, I noticed a few more galaxies to the left of M105 on my star charts. By changing the center of the frame from M96 to M105, I was able to pick up 3 more galaxies in frame. Rather than imaging 3 galaxies, I would now be targeting 8 galaxies!
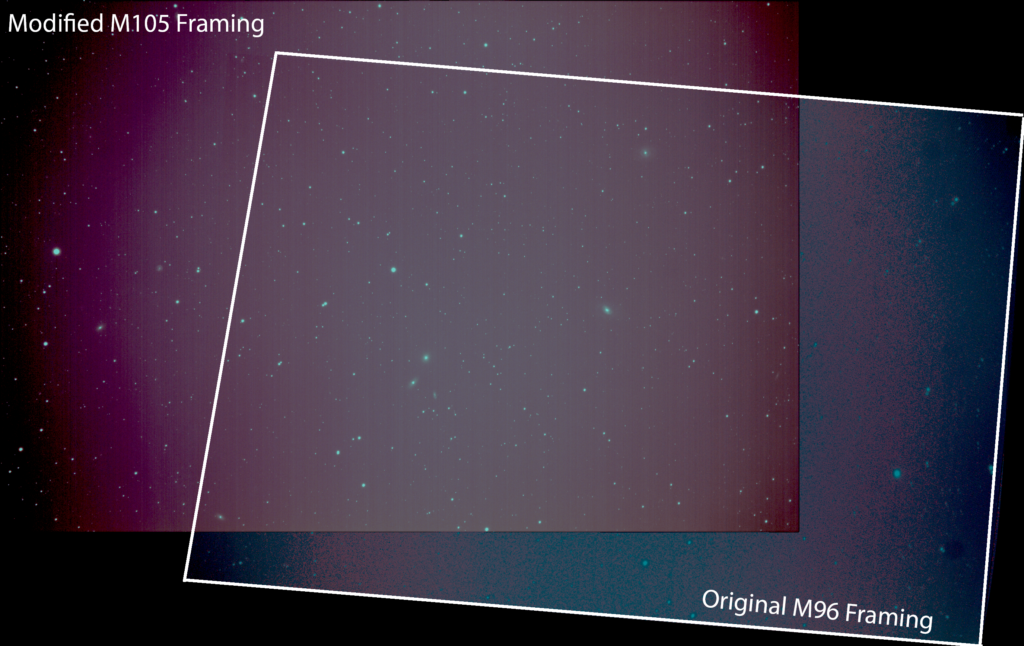
In summary, there were 3 issues that came up during the imaging process on February 8:
- Cleaning – Dust directly on the camera sensor causing distortions.
- Guiding – Clouds causing loss of guide-star.
- Framing – Better framing by moving to a different target.
Processing
After I got my camera back from cleaning at Albuquerque Photo-Tech, I got out the scope again on February 11th and properly calibrated it. I was able to capture 17 5-minute exposures to use for the image. I used DeepSkyStacker to automatically align and stack the top 12 exposures, resulting in a 1-hour total exposure.
For the first time, I experimented with a technique called “drizzling”. This method was pioneered by the Hubble Space Telescope and released as open-source software. It uses slightly offset images to create much higher resolution images than the camera sensor is able to capture by exploiting the sensor’s undersampling of the telescope resolution. By deliberately varying the telescope position slightly, a different portion of the image will be sampled from. These differences can be used to upscale the image. The position variance is called “dithering”, the upscaling is “drizzling”.

For example, my imaging telescope has a resolving power of 1.9 arcsec. My camera sensor can resolve 2.97 arcsec/pixel. That means that I am undersampling what the telescope is capable of resolving by 33%. By dithering and drizzling, I was able to create a 48MP master from my 12MP sensor and get signal from a lot more galaxies than anticipated.

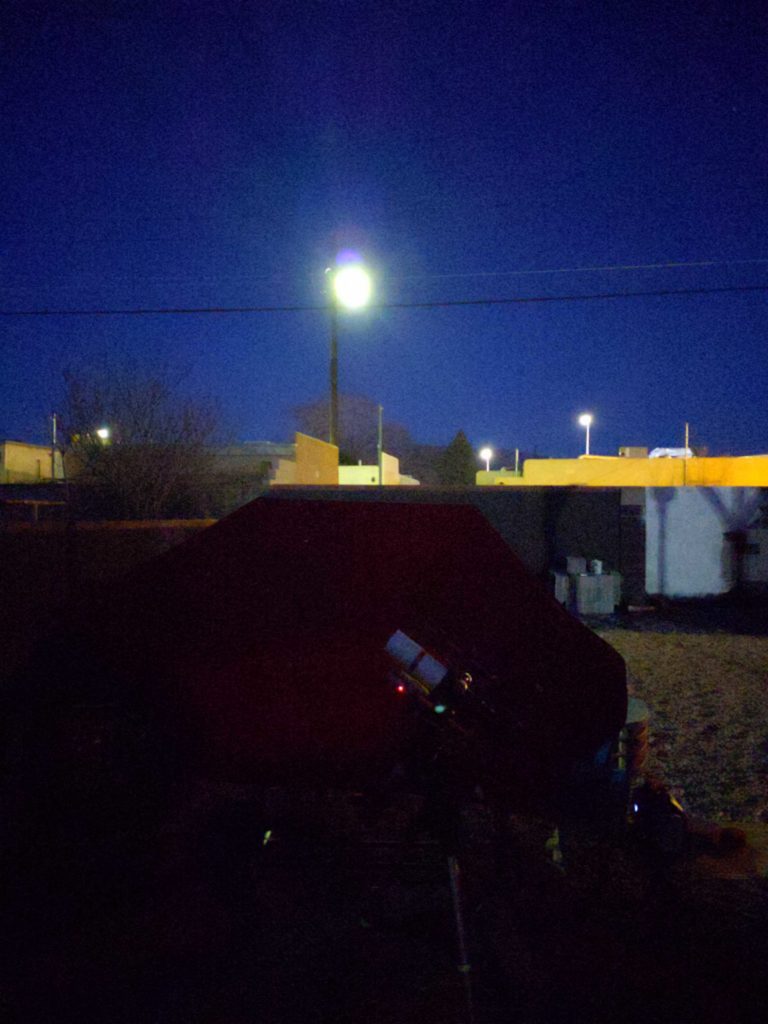
The major struggle for me in processing is light pollution and the uneven background it casts on my images. While I can get to dark skies pretty easily, outings require a lot of coordination for family duties, so I took this image in my backyard, almost directly under the neighbor’s flood light. No matter how I adjusted the color curves, I couldn’t remove the light pollution without also eliminating the galaxies. Finally, I found a tutorial on removing gradients by Astrobackyard. It detailed how to remove the light pollution through use of a threshold layer to create an artificial “flat” image representing the uneven light field. With the help of the tutorial, I was able to get a mostly-uniform background, although there’s some light vignetting remaining.
On the positive side, by zooming on so many parts of the image to examine the vignetting, I discovered another 12(!) galaxies in the frame, bringing the total to 20!
- Messier: M95, M96, M105
- NGC: 3338, 3357, 3367, 3377, 3377a, 3384, 3389, 3412
- PGC: 31937, 32371, 32393, 32488, 1403591
- UGC: 5832, 5869, 5897
- IC: 643
I was helped by two tools in identifying these galaxies: astrometry.net and Stellarium Web. Astrometry.net is awesome. You upload an image and it reports the celestial coordinates and objects in view. It’s completely open source, so I can run the solver locally. Astrometry is how I ensure proper alignment of the scope and accurate go-to movements while in the field. Stellarium Web is a browser-based planetarium that has a huge object database. While processing, I centered my view on M105, just like my camera, and used it to walk across the image to see what objects had resolved.
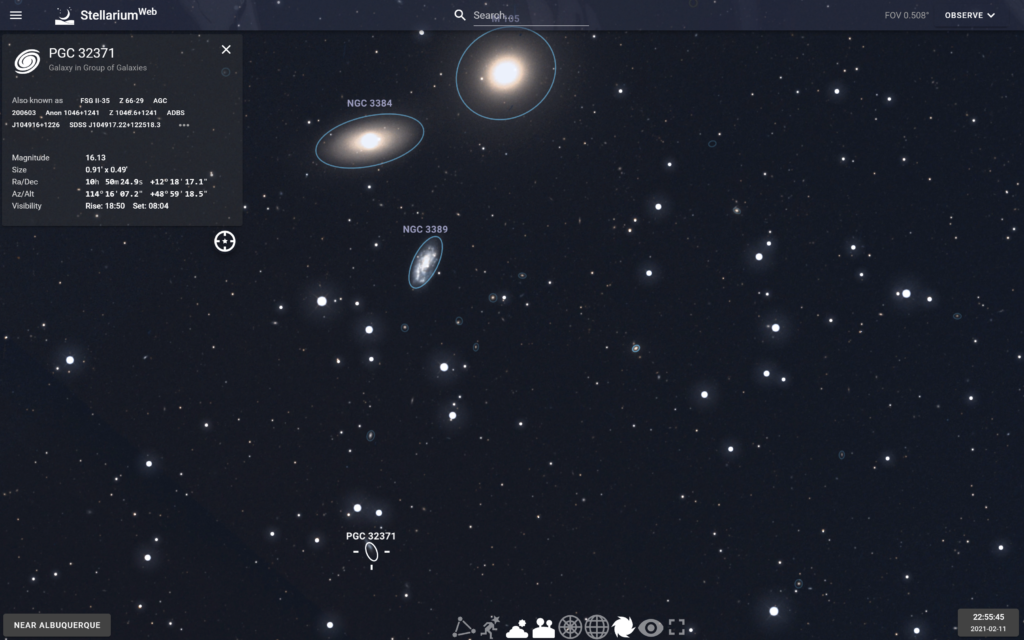
In summary, I used three new techniques on the processing side for the exposures I captured on February 11th:
- Drizzle – Boosting resolution through slightly offset, undersampled exposures.
- Vignette removal – Photoshop threshold filters, combined with selective removal of deep space objects from the background field to produce a gradient mask.
- Locating objects – Astrometry and Stellarium Web to ensure alignment and get object names.
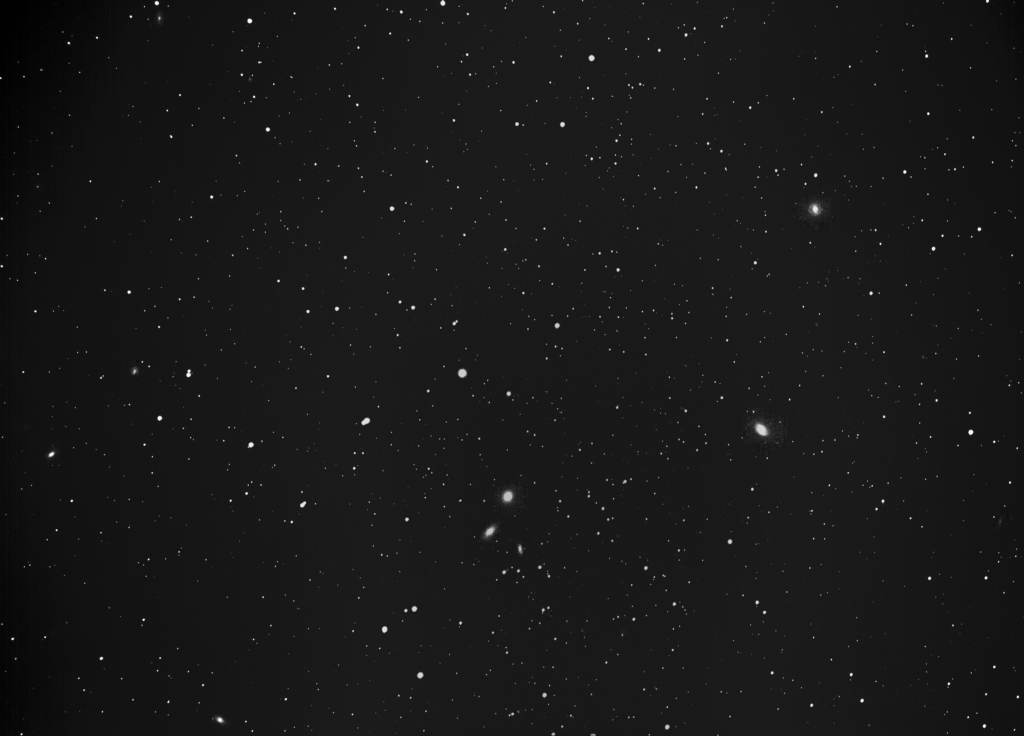
And here it is! 20 galaxies in a single image.
Conclusions
Two final notes on this field report:
- Starting with a simple, manual scope was absolutely the right decision. I wrote about this for anyone considering a telescope purchase, especially if they want to share it with their family. The depth of understanding necessary to identify problems in the imaging process is enormous and learning one-step-at-a-time is highly recommended. Dip in a toe first. Don’t drop $2,000 and get frustrated because you can’t get it to work.
- Less-than-perfect equipment makes room for experimentation. I started taking images with my cell phone and a manual mount. Right now I’m using my wife’s Canon EOS Rebel T3 from 2011. I’m not going to get Hubble-quality images in my backyard, but it’s amazing to learn the limits of our consumer technology and then push those limits. I’ve been astonished at what’s possible and how quickly my knowledge has grown based on necessity to get to the next level.
Thanks for reading!

